Leaking Pipe Repair
A leaking pipe is one of those problems that starts small and turns big fast. One morning it’s a small drip under the sink. A week later, you’ve got water damage, mold starting to form, and a repair bill that hurts.
The good news? A lot of pipe leaks are fixable without calling a plumber immediately. And even when you do need a professional, knowing what’s happening gives you a real advantage.
In this guide, you’ll learn exactly how to identify where a pipe is leaking, which repair method to use depending on the situation, what tools and materials you’ll need, and when it’s genuinely time to step back and call an expert.
What Is a Leaking Pipe?
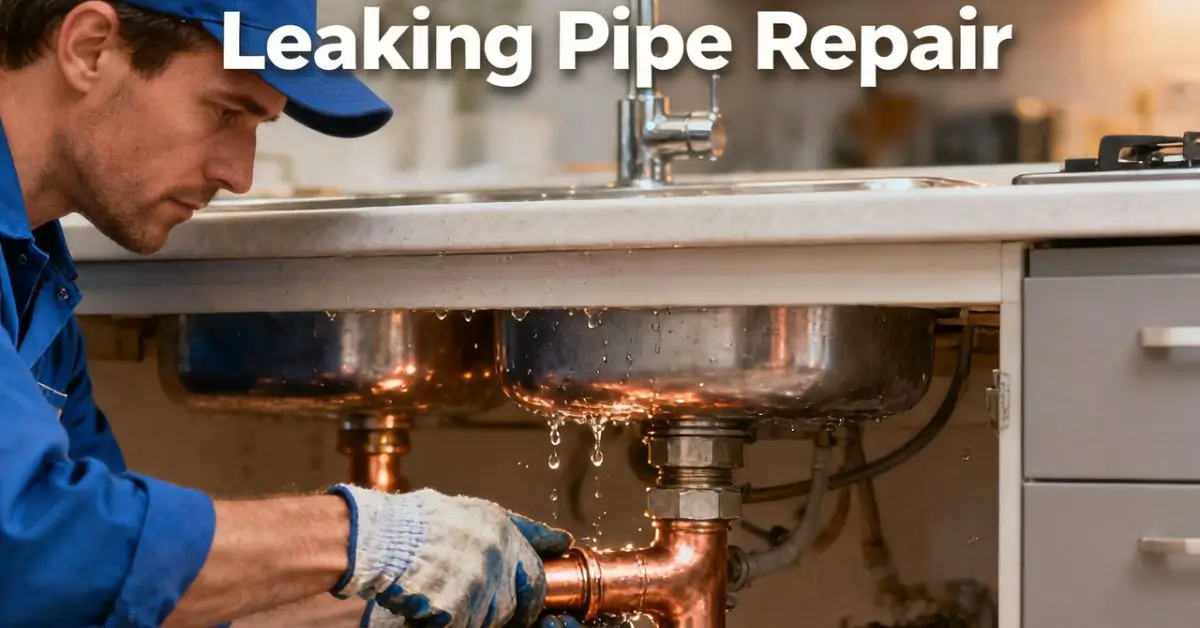
A leaking pipe is any water supply or drainage pipe that allows water to escape from a point it shouldn’t — whether from a joint, a crack, a pinhole, or a damaged fitting. Leaks can occur in walls, under floors, under sinks, or along exposed plumbing lines. They range from a slow drip to a burst that releases water rapidly.
Quick Summary
- Pipe leaks come from cracks, loose joints, corrosion, or high pressure
- Small leaks can be temporarily stopped with repair tape, epoxy, or clamps
- Permanent fixes usually involve cutting out and replacing the damaged section
- Always shut off the water supply before starting any repair
- Call a plumber if the leak is inside a wall, near electrical wiring, or at the main supply line
Why a Leaking Pipe Is Never Just a Small Problem
Most homeowners underestimate pipe leaks. A leak that loses just one drip per second wastes over 3,000 gallons of water a year — that’s money going straight down the drain.
Beyond water waste, ongoing leaks cause:
- Structural damage — water softens wood, weakens drywall, and damages flooring over time
- Mold and mildew growth — this typically starts within 24–48 hours of consistent moisture
- Higher utility bills — even slow leaks show up on your water bill
- Compromised water pressure — a leak in your supply line can reduce pressure throughout the house
A homeowner in Texas once ignored a slow drip under their kitchen sink for two months. By the time they checked properly, the cabinet base had rotted through and needed full replacement — turning a $15 repair into a $600 job.
Don’t let that be your story.
Step 1: Find the Source of the Leak
Before you fix anything, you need to find exactly where the water is coming from. This sounds obvious, but water travels — a leak in one spot can show up as a wet patch somewhere else entirely.
Here’s how to locate the source:
- Dry everything off first. Wipe the pipe and surrounding area completely dry with a cloth or paper towel.
- Run the water slowly and watch carefully where water first appears.
- Check joints and connections first — these are the most common leak points.
- Look for white mineral deposits or rust stains — these are signs of an older, ongoing leak.
- Check the water meter — turn off all water in the house and watch the meter. If it’s still moving, you have a leak somewhere in the system.
If the leak is inside a wall (you hear dripping but can’t see it), or if the floor feels soft or warm in one spot, that’s a sign of a hidden leak and that usually means calling a plumber.
Step 2: Turn Off the Water Supply
This is non-negotiable. Before touching any pipe, shut off the water.
- For a localized repair (under the sink, at a fixture), turn off the shut-off valve directly behind or under that fixture.
- For a main line leak, turn off the main shut-off valve — usually found where the water line enters the house (basement, utility room, or outside near the foundation).
Once the water is off, open the nearest faucet to release pressure and drain the remaining water from the pipe.
Step 3: Choose the Right Repair Method
Not every leak needs the same fix. Here’s a clear breakdown of your options:
Comparison Table: Pipe Repair Methods
| Method | Best For | Difficulty | Cost Estimate | Durability |
|---|---|---|---|---|
| Repair Tape (Silicone/Fiberglass) | Pinhole leaks, small cracks | Easy | $5–$15 | Temporary |
| Epoxy Putty | Small cracks, joint leaks | Easy–Medium | $8–$20 | Semi-permanent |
| Pipe Repair Clamp | Straight pipe cracks | Medium | $10–$30 | Temporary–Medium |
| Slip Coupling | Damaged section replacement | Medium | $10–$40 | Permanent |
| Full Pipe Replacement | Severely damaged pipe | Hard | $50–$300+ | Permanent |
Option A: Pipe Repair Tape
Pipe repair tape — also called self-amalgamating silicone tape or fiberglass wrap tape — is the fastest temporary fix for small pinhole leaks or hairline cracks.
How to use it:
- Dry the pipe completely
- Wrap the tape tightly around the leak point, starting a few inches before and ending a few inches after
- Overlap each layer by about half
- Press firmly as you go — the tape bonds to itself under pressure
This works well as a stop-gap measure, but it’s not a permanent solution. Plan a proper fix within a few days.
Option B: Epoxy Putty
Epoxy putty is excellent for small cracks, leaking joints, and pipe connections. It’s waterproof once cured and much more durable than tape alone.
How to use it:
- Turn off the water and dry the area
- Put on gloves — epoxy is a skin irritant
- Cut or tear off a piece of epoxy, then knead both parts together until the color is uniform
- Press and mold it firmly over the leak, smoothing the edges
- Allow it to cure fully (check product instructions — usually 20–60 minutes)
- Turn the water back on slowly and check for any dripping
This is a solid choice for minor pipe damage in accessible areas.
Option C: Pipe Repair Clamp
A repair clamp is a metal sleeve with a rubber gasket inside. You fit it over the damaged section and tighten the screws — the rubber presses against the pipe and seals the leak.
This is ideal for cracks along a straight section of pipe. It’s a stronger temporary fix than tape and works well on copper, PVC, and galvanized steel pipes.
Option D: Slip Coupling (Permanent Fix)
If the pipe section is too damaged for a clamp or putty, the right move is to cut out the damaged section and replace it with a new piece using slip couplings.
What you’ll need:
- Pipe cutter or hacksaw
- Two slip couplings (sized for your pipe diameter)
- A replacement pipe section (same material as existing pipe)
- Pipe cement (for PVC) or a soldering kit (for copper)
This is the proper permanent repair. It’s more involved but completely fixes the problem.
Option E: Full Pipe Replacement
If a pipe is badly corroded, cracked along a long section, or showing multiple leak points, replacing the entire pipe run is the right answer. This is best left to a licensed plumber unless you’re experienced with plumbing work.
Step 4: Check Your Work
Once any repair is done:
- Turn the water back on slowly
- Watch the repaired section for 10–15 minutes
- Run water through the pipe at full pressure
- Feel around joints and edges — even a small drip means the repair needs to be redone or upgraded
Don’t assume it’s fixed just because it looks dry. Give it time.
When to Stop and Call a Plumber
Some situations are beyond DIY — and recognizing them early saves you money in the long run.
Call a licensed plumber if:
- The leak is inside a wall, ceiling, or under the floor
- You see signs of black mold around the pipe
- The pipe is close to electrical wiring or a breaker box
- The main supply line is leaking
- The pipe is made of polybutylene (gray plastic, common in homes built 1978–1995) — these are prone to systemic failure
- You’ve tried a repair and the leak keeps returning
A professional plumber has the diagnostic tools and experience to fix the root cause — not just the symptom.
Preventing Future Pipe Leaks
The best leaking pipe repair is the one you never have to make. Here’s how to reduce your risk:
- Insulate pipes in unheated spaces — frozen pipes crack and burst
- Monitor your water pressure — anything above 80 PSI puts stress on joints and fittings. A pressure reducing valve (PRV) costs $50–$150 and protects your entire system
- Check under sinks twice a year — look for early signs of moisture, rust, or drips
- Soften hard water — mineral buildup corrodes pipes from the inside over time
- Know where your main shut-off valve is — in an emergency, every second counts
Conclusion
A pipe leak may seem small at first, but it can quickly lead to costly water damage, mold, and higher utility bills. The key is to act fast, shut off the water, identify the source, and choose the right fix for the type of damage. Some temporary solutions can help in an emergency, but a proper leaking pipe repair is always the best long-term answer.
If the leak is hidden, keeps coming back, or affects a main water line, calling a licensed plumber is the smartest move. A quick response today can save you a much bigger repair tomorrow.
Frequently Asked Questions
Can I repair a leaking pipe without turning off the water?
No, you should always shut off the water before attempting any pipe repair. Working on a live pipe is dangerous, ineffective, and risks making the leak worse. Even temporary fixes like repair tape require a dry, pressureless surface to bond properly.
How do I know if a pipe is leaking inside my wall?
Look for unexplained damp patches, bubbling paint, a musty smell, or soft/warped drywall. You can also turn off all water and watch your water meter if it’s still moving, there’s an active leak somewhere in the system.
Is leaking pipe repair covered by home insurance?
It depends on your policy and the cause. Sudden, accidental leaks (like a pipe bursting) are often covered. Slow leaks caused by gradual deterioration or neglect are usually not. Always check your specific policy and report damage promptly. Delayed reporting can void a valid claim.
What type of tape is best for fixing a leaking pipe?
Self-amalgamating silicone tape is the most reliable option for a temporary fix. It bonds to itself without adhesive, is waterproof, and works on most pipe materials. Fiberglass wrap tape is stronger and better for slightly larger cracks when combined with resin.
How long does epoxy putty last on a pipe leak?
Good-quality epoxy putty can last for several years on a low-pressure pipe, but it’s still considered a semi-permanent repair. For high-pressure supply lines, the proper fix is always to replace the damaged section. Always follow the manufacturer’s curing time before turning the water back on.