Adding or remodeling a bathroom is one of the most significant home improvement projects a homeowner can undertake. Before the tile goes down, before the vanity is installed, and before a single fixture is connected, there is a critical phase that determines whether everything works correctly for the life of the home.
That phase is bathroom rough in plumbing. Get it right and the finished bathroom functions perfectly for decades. Get it wrong and the consequences range from inconvenient to extremely expensive, involving tearing out finished walls and floors to access pipes that were installed incorrectly.
This guide explains exactly what bathroom rough in plumbing is, what the standard measurements are, how the process works step by step, what mistakes to avoid, and how to know whether this is work you can do yourself or work that requires a licensed plumber.
What Is Bathroom Rough In Plumbing?
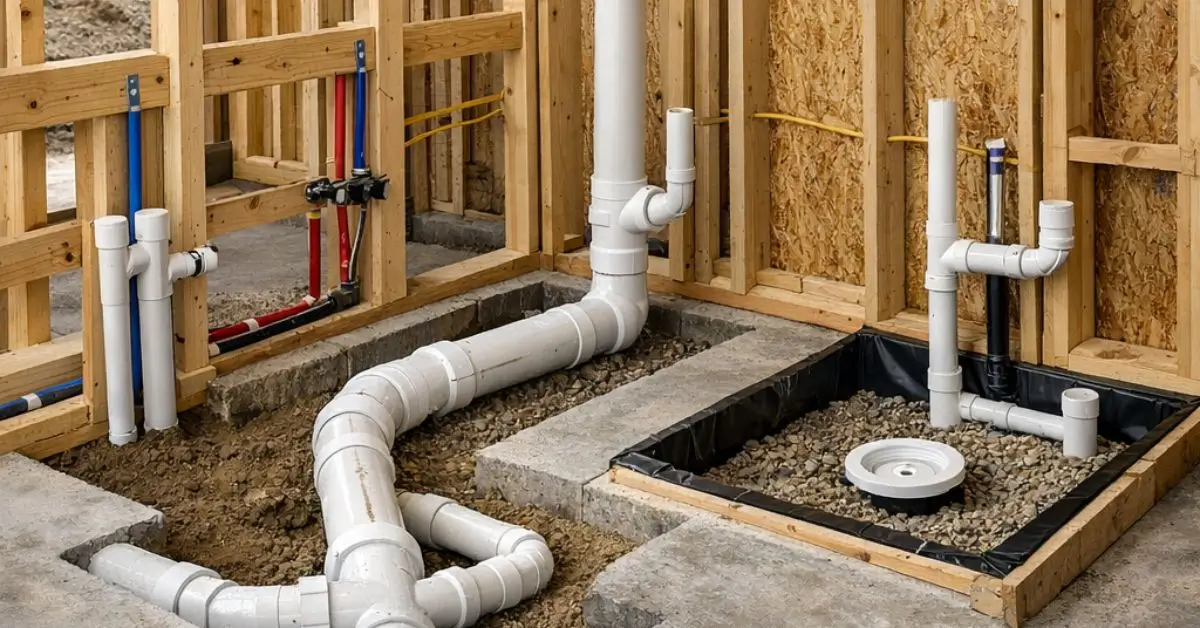
Bathroom rough in plumbing is the first phase of bathroom plumbing installation, completed before walls are closed and floors are finished. It involves running all drain, waste, vent, and water supply lines to their correct positions based on where fixtures like the toilet, sink, shower, and bathtub will be located. The rough in phase establishes the structural plumbing foundation that all visible fixtures connect to once finishing work is complete.
Quick Summary
Bathroom rough in plumbing involves installing all drain, vent, and supply lines before walls and floors are finished. Standard toilet rough in distance is 12 inches from the finished wall. This guide covers measurements, the installation process, common errors, and when to hire a professional for this critical work.
Why Rough In Plumbing Is the Most Critical Phase
Most people think about plumbing when a faucet drips or a toilet runs. But the most consequential plumbing work happens during construction, before anyone can see any of it.
Rough in plumbing establishes every drain location, every supply line position, and every vent connection in the bathroom. These positions are fixed once the subfloor is down and the walls are closed. Moving them after the fact means opening up finished surfaces, which is expensive, disruptive, and time-consuming.
A toilet drain installed two inches off from where it should be will either prevent the toilet from fitting at all or create a situation where the toilet rocks and leaks at the base. A shower drain positioned incorrectly causes the finished floor to slope the wrong way. Vent pipes that are not properly connected result in drains that gurgle, drain slowly, or push sewer gas back into the living space.
Getting bathroom rough in plumbing right the first time is not just about convenience. It is about protecting a significant financial investment in the finished bathroom.
Standard Rough In Measurements You Need to Know
The most critical measurements in bathroom rough in plumbing are standardized across the US building industry. Knowing these before any work begins is essential.
Toilet Rough In Distance
The toilet rough in measurement is the distance from the finished wall behind the toilet to the center of the toilet drain. The standard in the US is 12 inches. Some older homes have 10-inch or 14-inch rough ins, and some toilets are manufactured to fit these non-standard dimensions.
Before purchasing a toilet, confirm the existing or planned rough in distance. A toilet designed for a 12-inch rough in will not work correctly in a 10-inch rough in space without modification.
Toilet Drain Size
The toilet drain requires a 3-inch diameter pipe in most jurisdictions, though some local codes require 4-inch. The drain should be located precisely at the rough in distance from the wall with the flange sitting flush with or slightly above the finished floor level.
Sink Drain Height
The sink drain rough in height from the finished floor is typically 16 to 20 inches, depending on the vanity height. The drain stub-out should be centered below where the sink drain will connect.
Sink Supply Lines
Hot and cold supply lines for the sink are typically roughed in at 21 to 24 inches above the finished floor, positioned 4 inches to the left and right of the drain center. These measurements accommodate standard vanity configurations and allow for supply line connections without excessive bending or custom fittings.
Shower Drain
The shower drain position depends on the shower base or custom tile work being used. For a standard prefabricated shower base, the drain location is specified by the manufacturer. For custom tile showers, the drain typically centers in the shower floor with the surrounding tile sloped at a minimum of 1/4 inch per foot toward the drain.
Shower Supply and Valve Height
The shower valve rough in height is typically 48 inches above the finished floor for a standard shower. The showerhead rough in is 78 to 80 inches above the finished floor. These heights can vary based on the specific valve trim and showerhead being used.
Bathtub Drain
Bathtub drain positioning depends on the specific tub being installed. Always verify the drain location from the manufacturer’s installation guide before roughing in a drain for a bathtub. Getting this wrong by even a few inches can prevent the tub from being installed without custom work.
Standard Rough In Measurements Reference
| Fixture | Measurement | Standard Dimension |
|---|---|---|
| Toilet rough in | Wall to drain center | 12 inches |
| Toilet drain pipe | Diameter | 3–4 inches |
| Sink drain | Height from floor | 16–20 inches |
| Sink supply lines | Height from floor | 21–24 inches |
| Shower valve | Height from floor | 48 inches |
| Showerhead | Height from floor | 78–80 inches |
| Shower floor slope | Toward drain | 1/4 inch per foot |
These are standard US measurements. Always verify with local building codes and manufacturer specifications for the specific fixtures being installed.
The Rough In Process Step by Step
Understanding how bathroom rough in plumbing works as a sequence helps you plan the work correctly and communicate clearly with any plumber you hire.
Step 1: Plan the layout
Before cutting a single pipe, establish the exact location of every fixture on the subfloor. Mark the toilet drain center, sink drain location, shower drain position, and bathtub drain. This layout determines where every pipe needs to go.
Planning also means understanding the direction of existing drain lines and where the new drains will connect to the main stack or existing drain system. Drain lines must maintain a consistent slope of 1/4 inch per foot toward the main drain to flow correctly by gravity.
Step 2: Install drain and waste lines
Drain lines are installed first because they require cutting into the subfloor and sometimes into floor joists. The toilet drain connects to a 3-inch or 4-inch drain line. Sink and shower drains typically connect to 2-inch or 1.5-inch drain lines depending on local code requirements.
All drain connections must be properly glued with PVC primer and cement for PVC pipe, or connected according to the appropriate method for other pipe materials. Fittings must be oriented correctly to maintain slope and flow direction.
Step 3: Install vent lines
Every drain in the bathroom must be vented to prevent siphoning and allow sewer gas to escape safely through the roof. Vent lines connect from the drain pipes and run up through the wall framing and roof.
The toilet typically connects to the main vent stack directly. Sink and shower vents either connect to the main stack or run independently. Unvented drains or improperly vented drains are one of the most common causes of slow draining and gurgling in finished bathrooms.
Step 4: Install water supply lines
Supply lines for hot and cold water are run to each fixture location. In the US, modern construction almost universally uses PEX tubing for residential supply lines due to its flexibility, freeze resistance, and ease of installation. Copper remains common in some regions and is required by some local codes.
Supply lines stub out at the appropriate heights for each fixture and are capped until fixtures are connected during the finish phase.
Step 5: Install the toilet flange
The toilet flange is a fitting that connects the toilet to the drain pipe and anchors the toilet to the floor. The flange must sit flush with or slightly above the finished floor level. If it is too low after flooring is installed, a flange extension is required. Getting the flange height right during rough in avoids this additional step later.
Step 6: Pressure test and inspection
Before closing walls and floors, supply lines should be pressure tested and drain lines should be inspected for leaks. Most jurisdictions require a rough in inspection by the local building authority before walls can be closed. This inspection confirms that the work meets local plumbing code requirements.
Never close walls or install flooring before this inspection is completed and approved.
Common Rough In Mistakes and How to Avoid Them
These are the errors that appear most frequently in bathroom rough in plumbing and that cause the most expensive problems later.
Wrong toilet rough in distance. Measuring from the unfinished wall instead of the finished wall is the most common toilet rough in mistake. Finished walls add drywall thickness, typically 1/2 inch, to the measurement. Always account for the finished wall dimension when setting the rough in distance.
Incorrect drain slope. Drain pipes that are too flat will not drain properly. Drain pipes with too steep a slope can cause water to rush ahead of waste, leaving solids behind. Maintain exactly 1/4 inch drop per foot of horizontal run for reliable drainage.
Flange installed too low. If the toilet flange is at subfloor level and the finished floor adds tile and mortar, the flange ends up below the finished floor. This requires a flange extension and creates a less stable toilet installation. Set the flange to account for the planned finished floor height.
Missing or improper venting. Skipping vent connections or using inadequate vent configurations is a code violation and causes real drainage problems. Every drain needs a proper vent connection to the system.
Forgetting to cap supply lines. Open supply lines during construction create the risk of debris entering the pipe and blocking fixture valves when the water is turned on. Always cap supply line stub-outs until fixtures are ready to connect.
DIY vs. Professional Rough In Plumbing
Bathroom rough in plumbing is one of the more demanding home improvement tasks. Here is an honest assessment of when DIY is reasonable and when professional help is the right choice.
When DIY might be appropriate:
- You have plumbing experience and understand local code requirements
- The project is straightforward with clear access to existing drain and supply lines
- You have time to research requirements thoroughly and work carefully
- You are comfortable obtaining permits and scheduling inspections
When to hire a licensed plumber:
- You are adding a bathroom where no plumbing currently exists
- The project requires cutting into main drain stacks or modifying the main supply
- You are unfamiliar with local code requirements
- The project is in a finished space where mistakes will be very costly to correct
- Your local jurisdiction requires licensed plumber work for permit approval
In most US states, rough in plumbing work requires a permit and inspection regardless of whether a licensed plumber or homeowner performs the work. Check your local requirements before starting any work.
Conclusion
Bathroom rough in plumbing is the foundation that every other part of a bathroom renovation sits on. The measurements, pipe placements, and connections made during this phase are largely invisible in the finished bathroom but entirely responsible for how well it functions.
Taking the time to understand standard rough in dimensions, following the correct installation sequence, avoiding the most common mistakes, and getting the required inspections done properly protects both the investment in the renovation and the long-term performance of the finished bathroom.
Whether you are doing this work yourself or overseeing a contractor, understanding what good bathroom rough in plumbing looks like gives you the knowledge to ask the right questions and recognize when the work is being done correctly.
Frequently Asked Questions
What is the standard bathroom rough in measurement?
The standard toilet rough in is 12 inches from the finished wall to the drain center. Always measure from the finished wall, not the framing. Most modern toilets are built for this dimension, though 10-inch and 14-inch options exist.
What pipes are needed for bathroom rough in plumbing?
You need drain pipes, vent pipes, and water supply lines. Toilet drains use 3-inch PVC. Sink and shower drains use 1.5 to 2-inch PVC. Supply lines are typically PEX or copper. Always confirm pipe sizes with local code requirements.
How long does bathroom rough in plumbing take?
A licensed plumber takes one to two days for a standard bathroom. New additions may take two to three days. DIY installers should expect roughly double the professional timeline, plus additional time for inspection scheduling.
How much does bathroom rough in plumbing cost?
Standard bathroom rough in costs $1,500 to $4,000 in the US. Adding a completely new bathroom can cost $3,000 to $8,000 or more. Get multiple quotes from licensed local plumbers for accurate project-specific pricing.
Do I need a permit for bathroom rough in plumbing?
Yes. Nearly all US jurisdictions require a permit and inspection before closing walls and floors. Skipping this creates legal liability and potential costly corrections later. Contact your local building department before starting any work.
What is the toilet flange and why does it matter?
The flange connects the toilet to the drain pipe and anchors it to the floor. It must sit flush with or slightly above the finished floor. A flange set too low causes instability and potential leaks at the toilet base.