

How to Fix Leaking Shower Head: A Complete Step-by-Step Guide
A leaking shower head is one of those home problems that is easy to dismiss as a minor annoyance. A few drips between showers, a trickle when the water is turned off. It does not seem urgent.
But a shower head that drips once per second wastes more than 500 gallons of water per month. That is water bill money draining away continuously, and in many US states facing water restrictions, it is also an environmental concern worth taking seriously.
The better news is that fixing a leaking shower head is one of the most accessible plumbing repairs a homeowner can do. Most causes are simple, the parts cost under $15, and the whole repair typically takes thirty to sixty minutes with basic tools.
This guide covers how to diagnose exactly why your shower head is leaking, how to fix each type of leak, and when the repair is beyond a straightforward DIY job.
Fixing a leaking shower head means identifying and replacing the worn component causing water to escape from the shower head connection, nozzle, or arm after the water is turned off. The most common causes are worn rubber washers, deteriorated O-rings, failed cartridge seals, and compromised thread connections. Most repairs require only basic tools and inexpensive replacement parts available at any hardware store.
Quick Summary
Most shower head leaks are caused by worn washers, O-rings, or compromised thread connections. You can fix the majority of leaking shower heads in under an hour with a wrench, plumber’s tape, and a replacement washer or O-ring costing under $10. Diagnose where the water is coming from before attempting any repair. This guide covers every common cause and how to fix it.
Why Diagnosing the Leak Location Matters First
The most important step in fixing any shower head leak is not picking up a wrench. It is watching where the water actually comes from.
A drip from the shower head nozzle after the water is off has a different cause than a leak from the connection point where the head meets the arm. A trickle that only happens when the shower is running comes from somewhere different than a steady drip that continues for minutes after shut-off.
Taking sixty seconds to observe the leak before starting any repair prevents the most common DIY mistake: replacing the wrong part, reassembling the shower, and finding the leak continues unchanged.
Where is the water coming from?
- From the shower head nozzle after the water is turned off: points to the shower valve or cartridge
- From the connection between the shower head and the arm: points to thread seal or washer failure
- From cracks or holes in the shower head body: points to physical damage requiring replacement
- From the wall where the arm enters: points to the pipe connection behind the wall, which may need professional attention
Tools and Materials You Will Need
Before starting, gather these items. Having everything ready before you begin makes the repair faster and prevents multiple trips to the hardware store.
Tools:
- Adjustable wrench or channel-lock pliers
- Flathead screwdriver
- Soft cloth or rag (to protect chrome finish)
Materials:
- Plumber’s tape (also called Teflon tape or PTFE tape)
- Replacement rubber washer sized for your shower head
- Replacement O-ring if applicable to your model
- White vinegar for cleaning mineral deposits
- Small brush or old toothbrush
Total material cost for most repairs: $5 to $15
How to Fix a Leaking Shower Head: Step by Step
Fix 1: Leaking at the Connection Point (Thread Seal Failure)
This is the most common type of shower head leak and the most straightforward to fix. If water is dripping or seeping where the shower head screws onto the shower arm, the thread connection has failed.
Step 1: Turn off the water
Turn off the shower valve completely. You do not need to shut off the main water supply for this repair.
Step 2: Remove the shower head
Wrap the shower arm in a soft cloth to protect the finish. Use an adjustable wrench or pliers to grip the base of the shower head where it connects to the arm. Turn counterclockwise to unscrew. If it has not been removed in years, it may require firm pressure to break free initially.
Step 3: Inspect the threads
Look at the threads on both the shower arm and the shower head connection. You will likely see old plumber’s tape wrapped around the arm threads, possibly degraded, discolored, or missing sections. You may also see debris or mineral buildup.
Step 4: Clean the threads
Remove all old plumber’s tape from the arm threads. Clean both sets of threads with a small brush and white vinegar to remove mineral deposits and debris.
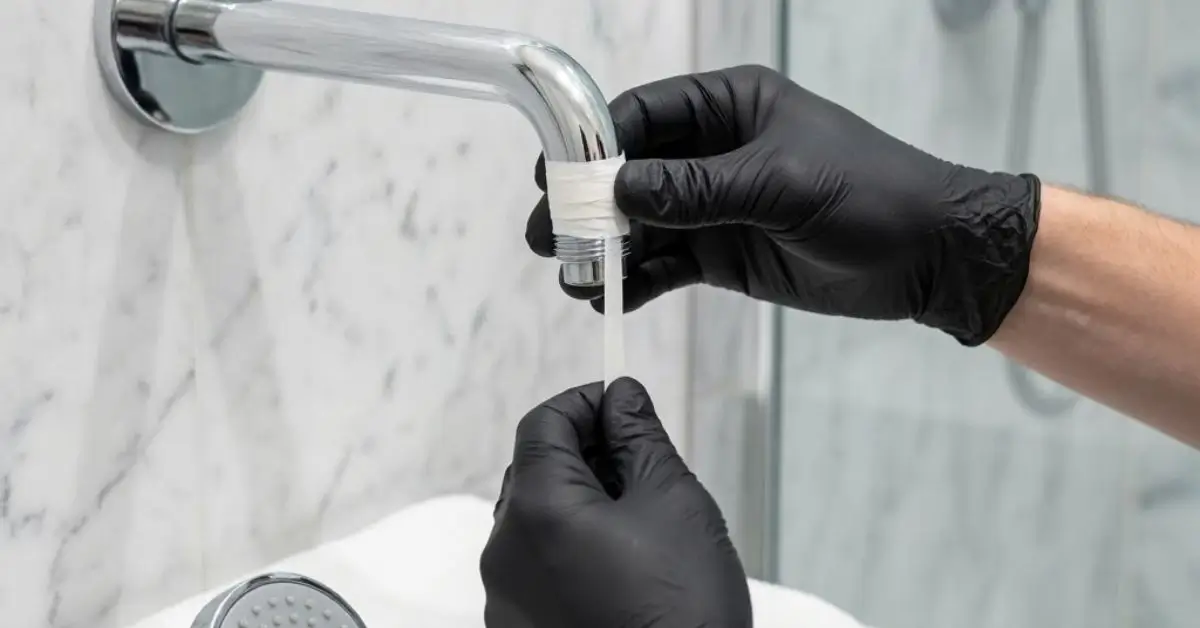
Step 5: Apply new plumber’s tape
Wrap fresh plumber’s tape clockwise around the shower arm threads. Apply two to three layers, wrapping in the direction of the threads so the tape tightens rather than unravels when you screw the head on. This tape fills the microscopic gaps between the threads and creates a watertight seal.
Step 6: Reinstall the shower head
Screw the shower head back onto the arm by hand first to ensure it threads correctly. Then use the wrench to snug it firmly. Do not overtighten. Firm hand pressure plus a quarter turn with the wrench is sufficient.
Step 7: Test
Turn the shower on, let it run for a minute, then turn it off. Check the connection point for any remaining leak. In most cases this resolves the problem completely.
Fix 2: Dripping from the Nozzle After Shut-Off (Washer or Valve Issue)
If water continues dripping from the shower head nozzle after the valve is fully closed, the issue is inside the shower valve, not in the shower head itself. The most common causes are a worn rubber washer or O-ring inside the valve, or a deteriorated cartridge.
Step 1: Turn off the water supply
For this repair, you need to turn off the water supply to the shower. Locate the shut-off valves for the shower, typically accessible through an access panel in the adjacent room or wall. If your shower has no dedicated shut-off valves, shut off the main water supply to the home.
Step 2: Remove the shower handle
The shower handle is held by a screw, typically concealed beneath a decorative cap at the center of the handle. Pry off the cap with a flathead screwdriver to access the screw. Remove the screw and pull the handle free.
Step 3: Access the valve
Behind the handle, you will see the valve cartridge or stem assembly. The specific appearance varies by faucet manufacturer. Common brands include Delta, Moen, Kohler, and Price Pfister, each with different cartridge designs.
Step 4: Identify the valve type
Cartridge valves have a cylindrical removable cartridge. Ball valves have a dome-shaped cover with a rotating ball inside. Compression valves have a threaded stem with a rubber washer at the tip.
Step 5: Replace the worn component
For compression valves: Unscrew the stem counterclockwise and remove it. At the bottom of the stem is a rubber washer held by a brass screw. Remove the screw, pull out the worn washer, and install a matching replacement. Apply a small amount of plumber’s grease to the new washer before installing.
For cartridge valves: Note the orientation of the cartridge before removing. Pull or unscrew the cartridge out of the valve body. Take it to a hardware store to match the replacement, as cartridges are brand and model specific. Install the new cartridge in the same orientation as the original.
For ball valves: Purchase a ball valve repair kit specific to your faucet brand. Kits include the ball, springs, seats, and O-rings needed for a complete repair.
Step 6: Reassemble and test
Reinstall the repaired or replaced component, reattach the handle, and restore water supply. Test the shower by running it and then turning it off. The drip should be eliminated.
Fix 3: Shower Head Clogged Causing Back-Pressure Leak
Mineral deposits from hard water can clog the shower head nozzles, creating back-pressure that causes water to seep from the connection point or through gaps in the head body.
Step 1: Remove the shower head as described in Fix 1.
Step 2: Soak in white vinegar
Submerge the shower head in a container of white vinegar for two to four hours. The vinegar dissolves mineral deposits that are causing restricted flow.
Step 3: Brush and rinse
Use an old toothbrush to scrub the nozzles and any remaining debris after soaking. Rinse thoroughly with water.
Step 4: Reinstall with fresh plumber’s tape and test. Cleared nozzles eliminate the back-pressure that was causing the leak in many cases.
Fix 4: Cracked or Damaged Shower Head Body
If the shower head body itself is cracked or has physical damage causing water to escape, no internal repair will resolve the problem. The shower head needs replacement.
Replacement shower heads range from $15 for basic models to $150 or more for premium designs. Removing the old head and installing a new one follows the same process as Fix 1 with the addition of purchasing a new unit. This is among the most straightforward plumbing replacement jobs available.
Common Causes and Fixes at a Glance
| Leak Location | Most Likely Cause | Fix Required | DIY Difficulty |
|---|---|---|---|
| Connection point to arm | Failed thread seal | Plumber’s tape replacement | Very easy |
| Nozzle drip after shut-off | Worn cartridge or washer | Cartridge or washer replacement | Moderate |
| Nozzle spray while off | Valve seat damage | Valve seat repair or replacement | Moderate |
| Head body seeping | Mineral buildup | Vinegar soak and cleaning | Easy |
| Physical crack in head | Physical damage | Shower head replacement | Easy |
| Leak at wall connection | Pipe connection issue | Professional plumber | Professional |
Preventing Future Shower Head Leaks
A few habits significantly extend the life of shower head connections and internal components.
Use plumber’s tape on installation
Any time a shower head is installed or reinstalled, apply fresh plumber’s tape to the arm threads. This is the single most effective prevention for connection point leaks.
Clean your shower head regularly
Monthly cleaning with vinegar prevents mineral buildup that causes back-pressure and accelerated wear on washers and O-rings. A small bag of vinegar secured around the head overnight dissolves deposits without any disassembly.
Avoid overtightening
Connection joints that are overtightened develop cracks over time and compress washers in ways that accelerate their deterioration. Firm but not forced is the right level for any threaded shower connection.
Replace washers proactively
If you are removing your shower head to clean it or for any other reason, check the washer condition. A washer that is flattened, cracked, or visibly compressed is close to failing. Replacing it while the head is already removed costs under $1 and prevents a future drip.
When to Call a Plumber
Most shower head leaks are genuinely DIY-accessible repairs. Call a professional when:
- Water appears to be coming from inside the wall rather than from the visible connections
- Multiple repair attempts have not resolved the drip
- The shower valve is visibly corroded or damaged beyond component replacement
- You do not have access panels and cannot reach the shut-off valves for the shower
- The repair reveals pipe damage or connection problems that extend beyond the valve and head
Conclusion
Fixing a leaking shower head is one of the home repairs that delivers the most satisfaction relative to the effort required. The tools are basic, the parts are inexpensive, and the result, no more dripping, wasted water, or growing water bill, is immediate and measurable.
Start by diagnosing exactly where the leak is coming from, then follow the appropriate fix for that specific cause. In most cases, you will have the problem resolved in well under an hour without spending a dollar on professional service.
If this guide helped you fix your leak, take a look at our related articles on how to replace a shower cartridge and choosing the best shower head for your bathroom. Both give you the practical knowledge for the next step in your shower maintenance or upgrade project.